How to host a WCF service in IIS 8
Introduction
Here in this article we will see how to configure and host a WCF service in IIS 8. When we want to expose our service to internet, hosting it in IIS is the easy and effective way to do it. When you host it in IIS, it comes with all the added advantage of the web server. If you don’t want to host in IIS, you could still do that with a console application running in a server machine. To know more on hosting a service in console application and exposing an http endpoint, you can refer to [Article] How to host a WCF service in console application using wsHttp binding. The entire configuration which you will see in this article will be for Windows 8 and Visual studio 2012.
- Configure IIS
- Create a WCF service.
- Hosting in IIS
1. Configure IIS
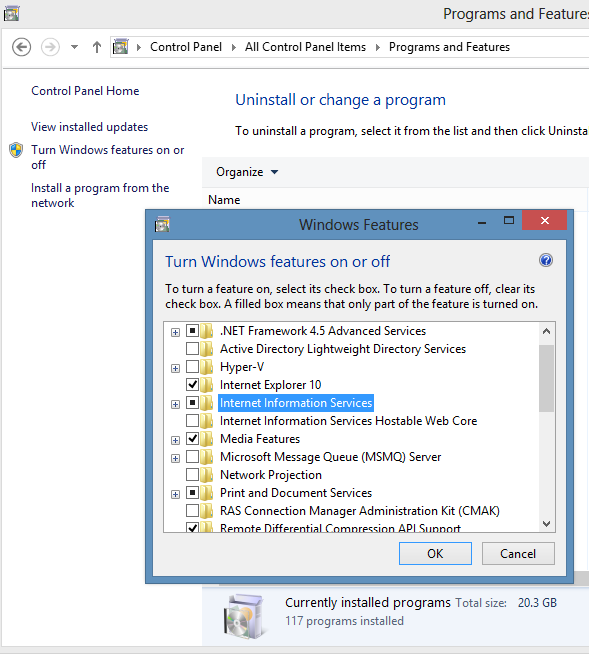
Enable IIS – Internet information service (IIS) will be disabled by default in windows 8. We need to enable this as a first step in hosting wcf. To do this you have to go to Control Panel -> Programs and Features and select Turn windows features on or off from the left side menu and enable IIS.
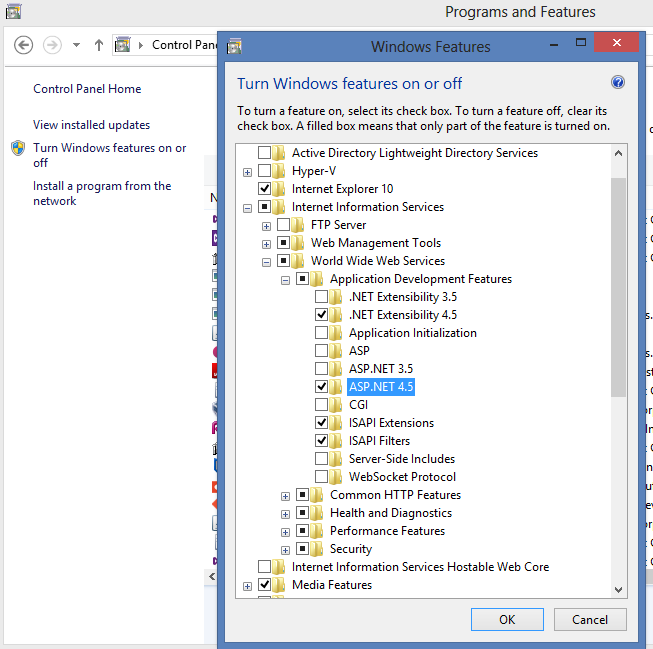
Enable Asp.Net – The runtime which is going to serve your wcf service when you host it in IIS is the ASP.Net. By default this is disabled in IIS, we have to enable this. Without ASP.Net IIS will not be able to serve your WCF service. To enable ASP.Net you have to go to Control Panel -> Programs and Features and select Turn windows features on or off and under Internet Information Service->World Wide Web service->Application Development Features select the ASP.Net version which you want.
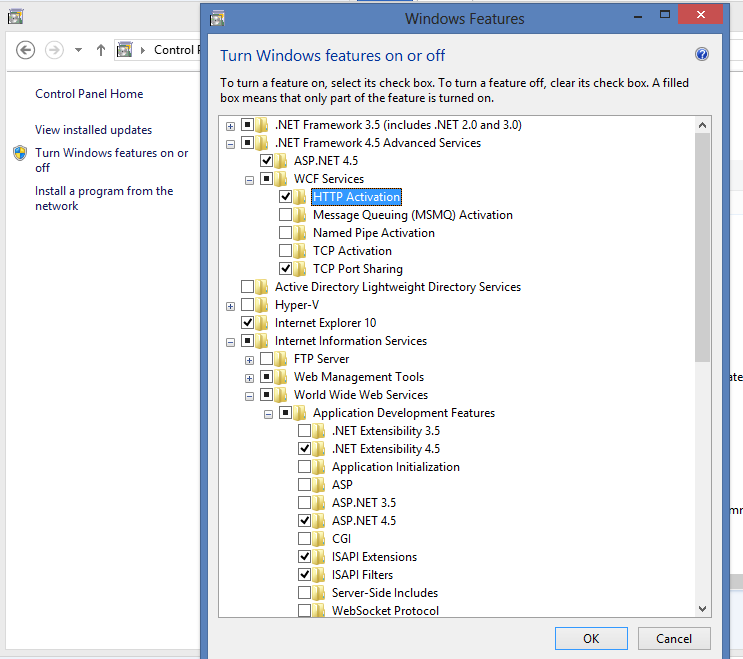
Enable WCF and its HTTP endpoint feature – We have to enable WCF and the WCF HTTP Activation feature in IIS. Without this IIS won’t be able to recognize the WCF service and it won’t be able to serve it. To enable this, go to Control Panel -> Programs and Features and select Turn windows features on or off and select .Net Framework 4.5 Advanced Services and enable WCF Services and HTTP Activation under WCF.
With this our basic features in IIS to host a WCF service is enabled. Now restart IIS and we should be able to host the WCF service.
2. Create a WCF service
Here to test hosting a WCF service, we will create simple WCF service. We will then host this WCF service to see it in action in IIS. To begin with, let’s create a service. Create a folder called Host_wcf. Inside this folder create another folder and name it as App_Code. To this folder, create a file called DataService.cs and copy paste the service code as given below.
using System;
using System.Collections.Generic;
using System.Linq;
using System.Text;
using System.Threading.Tasks;
namespace SqliteService
{
    using System.ServiceModel;
    [ServiceContract()]
    public interface IDataService
    {
        [OperationContract()]
        void AddCustomer();

        [OperationContract()]
        void AddProduct();
    }

    public class DataService : IDataService
    {
        public void AddCustomer()
        {
        }

        public void AddProduct()
        {
            throw new NotImplementedException();
        }
    }
}
Now create a file called services.svc in the root folder, i.e. to Host_wcf and add the below line of code into it.
<%@ServiceHost language=c# Debug="true" Service="SqliteService.DataService" CodeBehind="~/App_Code/DataService.cs" %>Here CodeBehind points to the file where we have the service implementation. Now we need a Web.config file in the root folder i.e. at Host_wcf folder. Copy paste the below line of code into it. Here the configuration is a prebuild configuration, to know more on how to create this end point, go to [Article] How to host a WCF service in console application using wsHttp binding.
<?xml version="1.0" encoding="utf-8" ?>
<configuration>
  <system.serviceModel>
    <behaviors>
      <serviceBehaviors>
        <behavior name="MEX">
          <serviceMetadata httpGetEnabled="true" httpsGetEnabled="false" />
        </behavior>
      </serviceBehaviors>
    </behaviors>
    <services>
      <service behaviorConfiguration="MEX" name="SqliteService.DataService">
        <endpoint address="Mex" binding="wsHttpBinding" bindingConfiguration=""
          name="Mex" contract="IMetadataExchange" kind="" endpointConfiguration="" />
        <endpoint address="IDataService" binding="wsHttpBinding" bindingConfiguration=""
          name="wsHttp" contract="SqliteService.IDataService" />
        <host>
          <baseAddresses>
            <add baseAddress="http://localhost:80" />
          </baseAddresses>
        </host>
      </service>
    </services>
  </system.serviceModel>
</configuration>
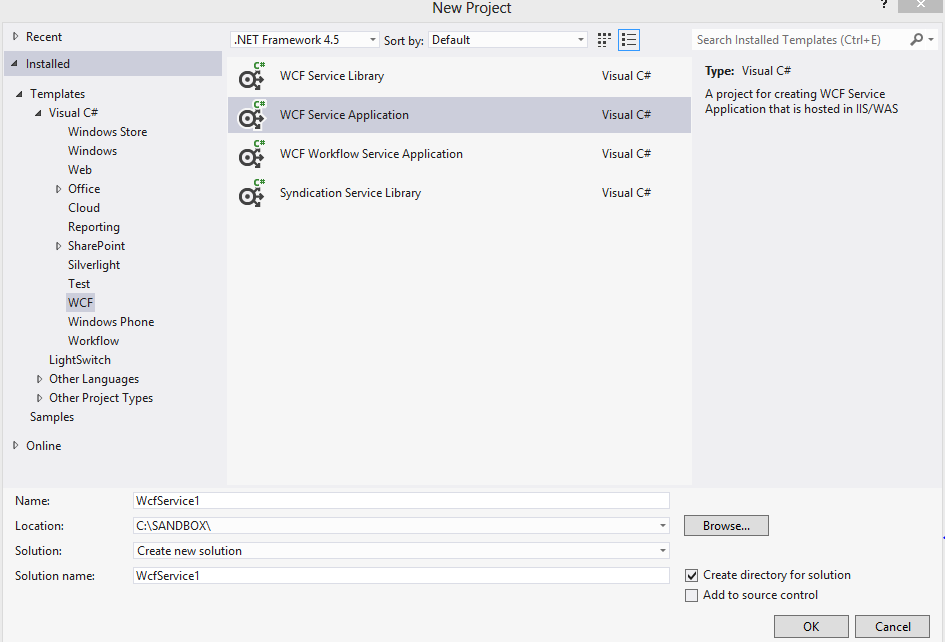
Now we need to set the permission for the root folder so that IIS can access content from this folder. Go to security settings of the root folder and give read and execute permission for “Everyone”. With this, we are ready with the service. When you host a service in IIS, it is the ASP.Net runtime which compiles the code behind and serve the service. So make sure that it is error free and it can compile properly. Alternatively you can create a WCF project using “WCF Service Application” project template in visual studio and compile the code to make sure that it can compile properly.
3. Hosting in IIS
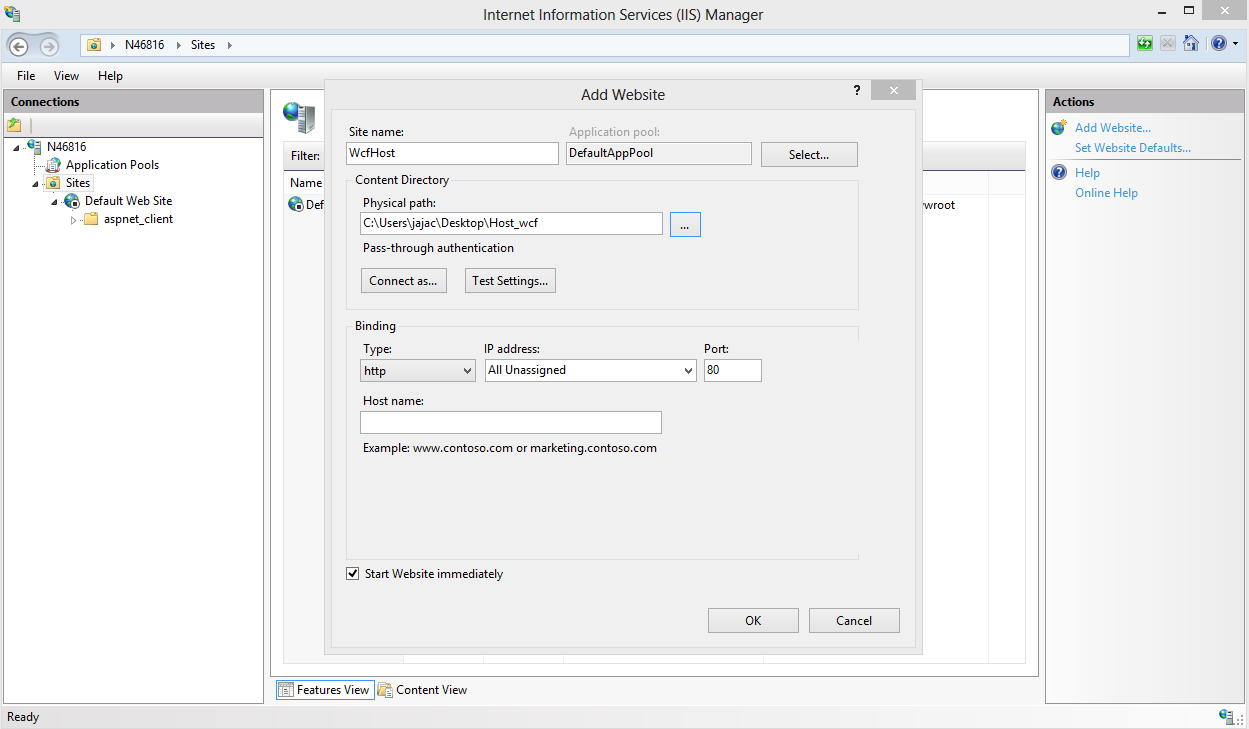
Now we will see how we can host a service in IIS. Let us launch IIS. To do this type “inetmgr” in Run, it will open up the Internet Information Service (IIS) Manager. Now expand the server from left hand side under Connection section. Now expand Sites. Here we will have a default website running, the default website will be using port no 80. We are also going to host the service on port 80 which is the default http port. We cannot have two websites using same port. So we will stop the default website for time being. To do this, right click on the Default Web Site and from Manage WebSite say stop. Now right click on the Sites and say Add Website and fill in the details as shown in the image below. We can also host our service as an application under the default website but let’s do it this way.
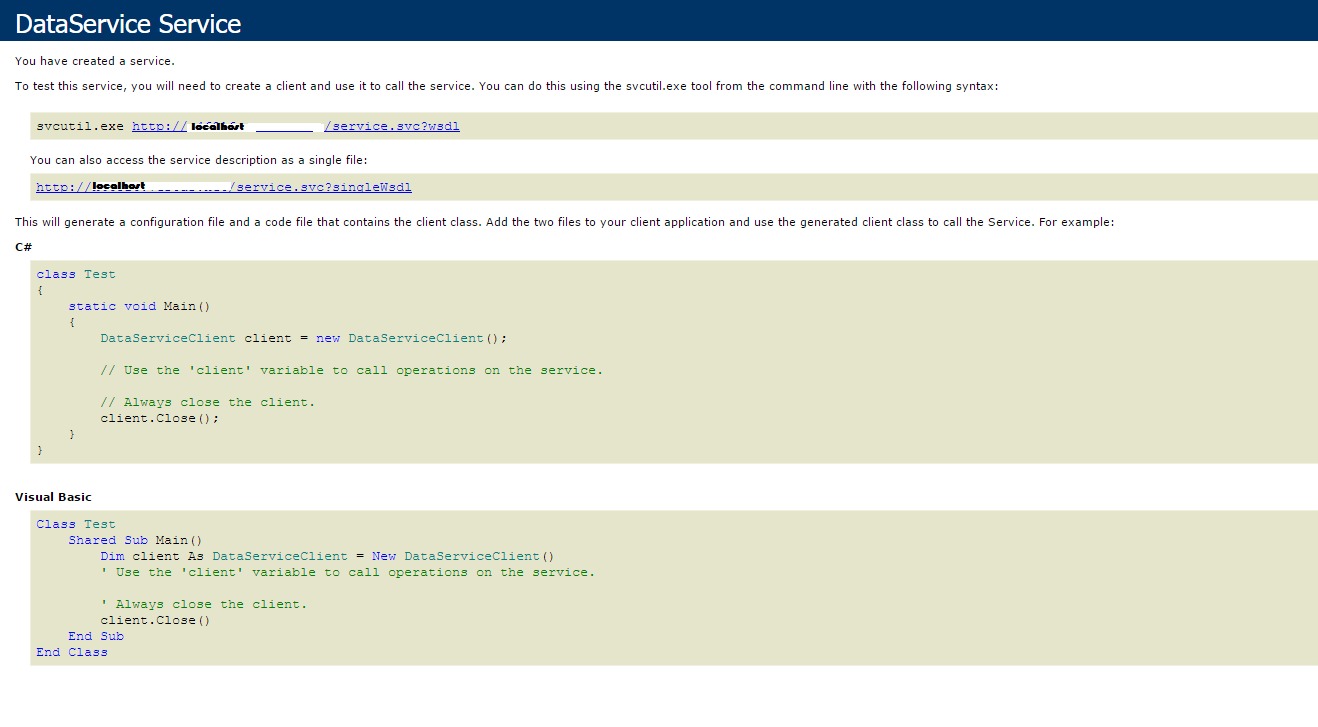
Now here the physical path is the path to our root directory which we created to hold the wcf service files. Say OK and your service should be ready to use now. Now to confirm this, we will browse the .svc file in our service.
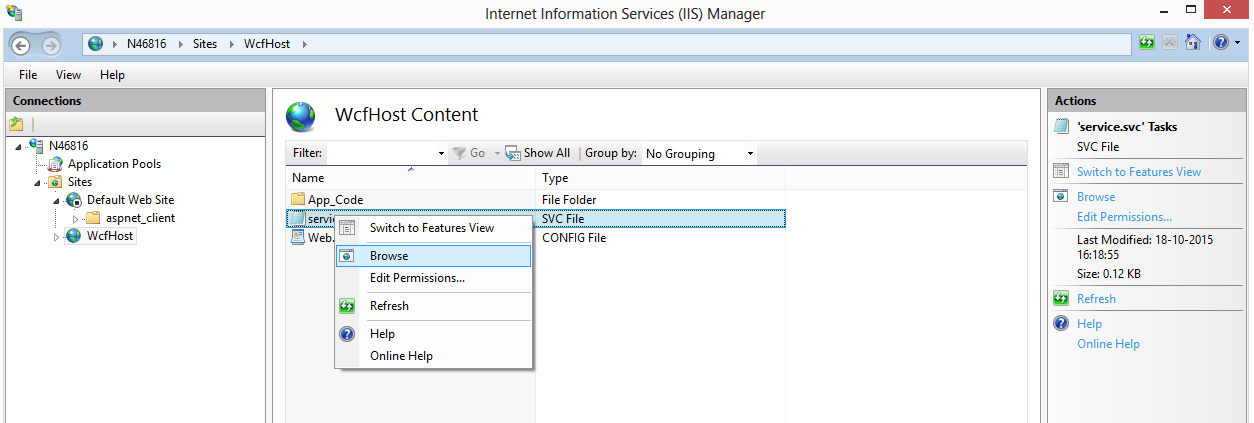
If everything is fine, it should pop up a page which looks something like as shown in the image below.

 I am a lead engineer at a prominent wind turbine manufacturing firm. My interests span a diverse range, and immersing myself in technology is one of them. This platform serves as my primary knowledge base, where I seek information and insights. Moreover, I utilize this platform to share my experiences and experiments, hoping they may benefit those following a similar path. It's important to note that the suggestions I express here are based on my best knowledge at the time of writing and may not necessarily represent the optimal solutions. I wholeheartedly welcome any comments you may have to improve or refine my ideas. Your feedback is greatly appreciated and valued.